Create textures and set materials for tires, rims, and chrome parts
Now that you created the single and cubemap textures for the car body, you start filling in the details of the car, creating textures and assigning them to materials for specific car parts.
In this step you create textures and define materials for the tires and rims, and you define the properties to create chrome effect for the chrome parts.
Create a texture for the tires
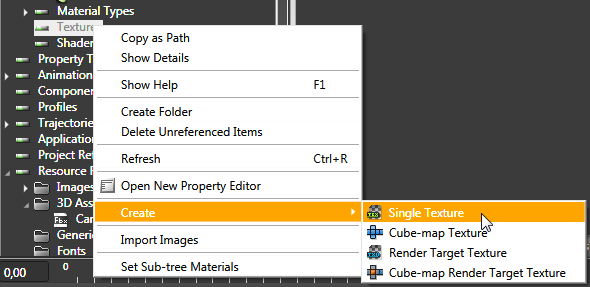
- In the Library right-click Materials and Textures > Textures and select Create > Single Texture.
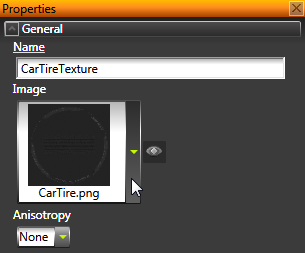
- Name the texture CarTireTexture and click OK.
-
In the Properties set the Image property to image CarTire.png.
- In the Library select Materials and Textures > Materials > Tire, and in the Properties set:
- Material Types to PhongTextured
- Texture to CarTireTexture

Create a texture for the rims
- In the Library > Materials and Textures > Textures create a new single texture and name it CarRimsTexture.
- In the Properties set the Image property of the CarRimsTexture to CarRim.png.
- In the Library select Materials and Textures > Materials > Rim, and in the Properties set:
- Material Types to PhongTexturedCube
- Texture to CarRimTexture
- Cube-map Texture to CarBodyCubemapTexture
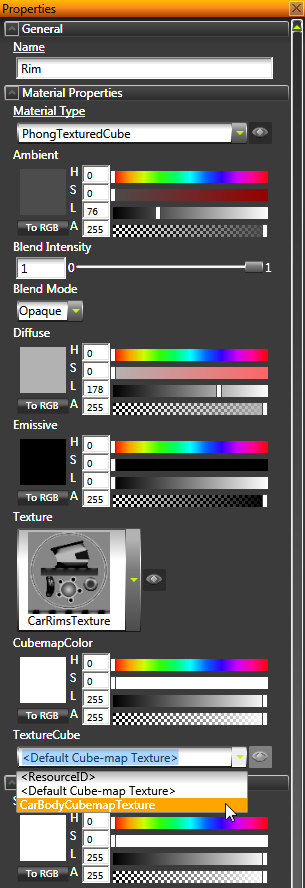
For the rims you use the same cubemap as you do for the car because you want the environment reflection to be the same for the rims as it is for the car.
Define properties for the chrome parts
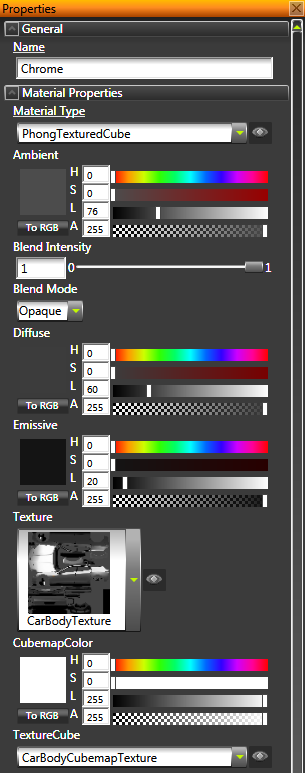
- In the Library select Materials and Textures > Materials > Chrome, and in the Properties set:
- Material Types to PhongTexturedCube
- Texture to CarBodyTexture
- Cube-map Texture to CarBodyCubemapTexture
- In the Properties adjust the color properties to get the chrome reflection, for example, set:
- Diffuse Color:
- Hue to 0
- Saturation to 0
- Light to 60
- Emissive Color:
- Hue to 0
- Saturation to 0
- Light to 20
< PREVIOUS STEP
NEXT STEP >
Open topic with navigation